Arendelle Aqua is blowing up the Disney Parks food and merchandise scene on both coasts and we've got a cake recipe that proves why this trend is worth the hype. A nod to the hometown of Frozen’s Elsa and Anna, this aqua color is both bold and princessy.
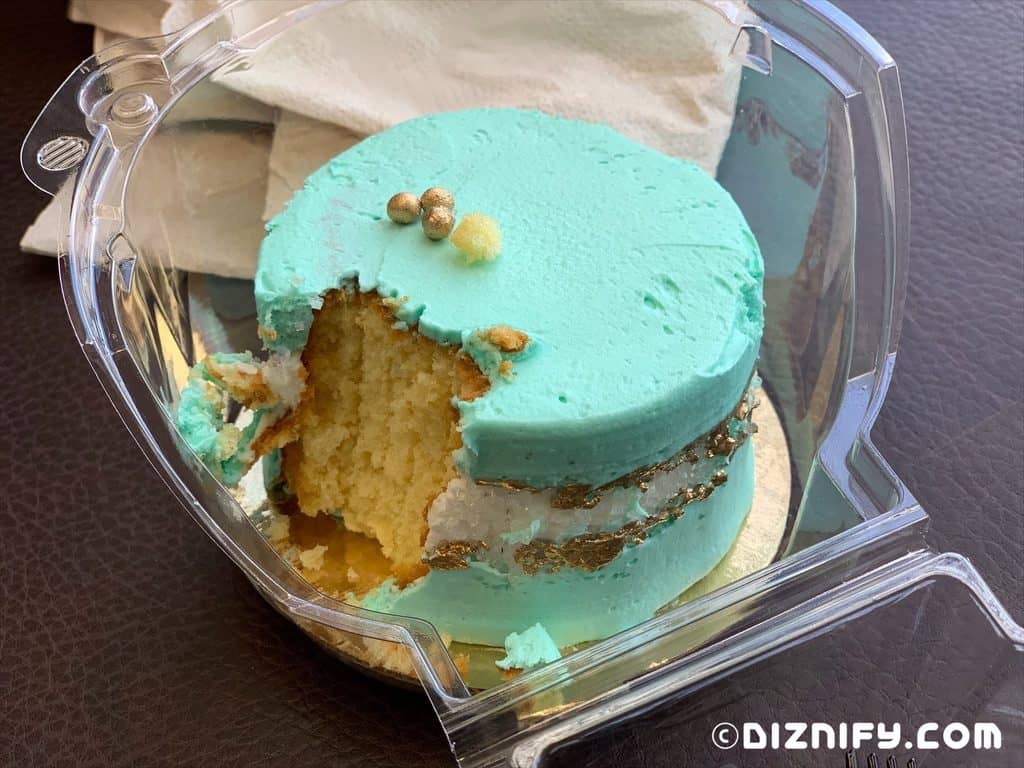
Our first encounter tasting an Arendelle Aqua treat came to us from Contempo Café in Disney’s Contemporary Resort. Known for its cupcakes, we were on the hunt for a substitute birthday cake for a member of our Diznify family. But, the morning we checked the bakery case, no cupcakes could be found. A rather official looking cast member noticed our confusion and informed us that cupcakes do not come out until lunch, but he could grab one from the back if we’d like.
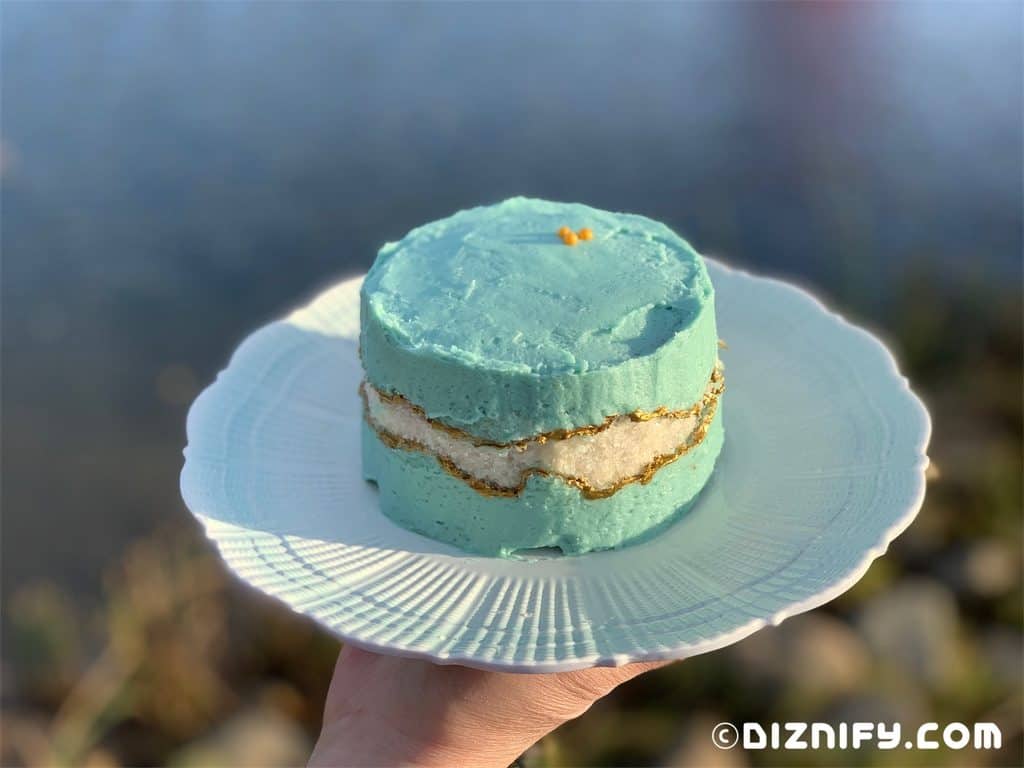
Among the “cupcake” options he listed was Arendelle Aqua Cake, described as a vanilla cake filled with blueberry jam. When it came out, we were so surprised and blown away by its beauty! This isn’t just a cupcake, it's a mini cake. As we sang happy birthday in the Bayview Gifts store, we marveled at this little work of art.
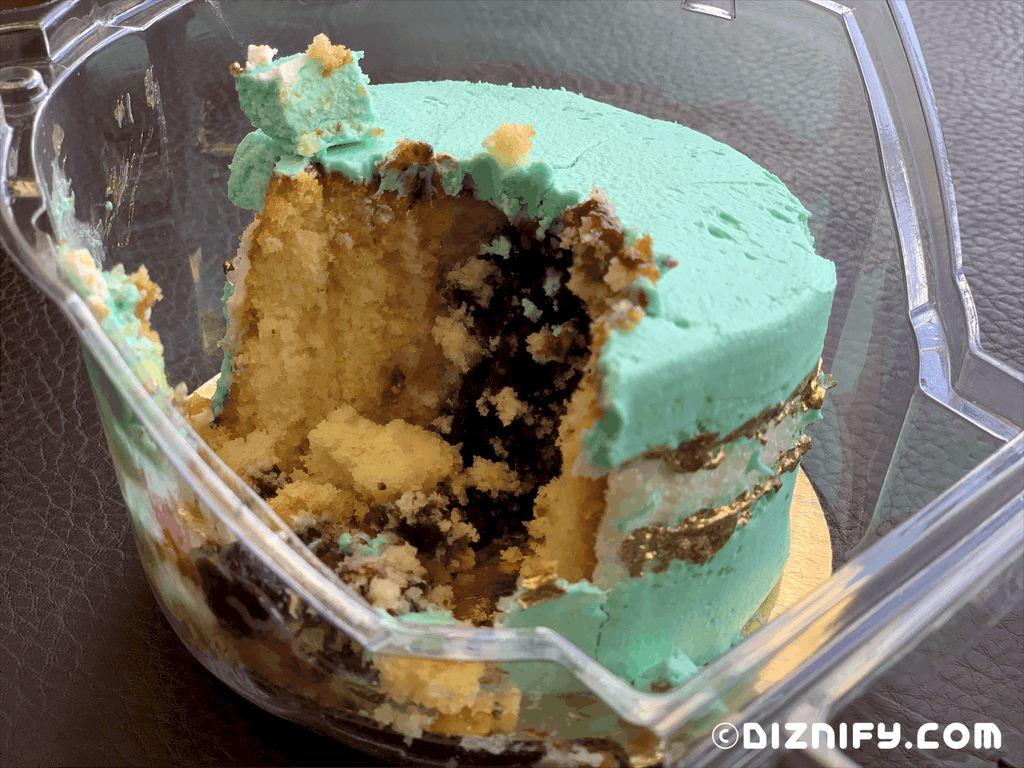
Elsa must be pouring her magical powers into this one, because the cake also tasted like perfection. The dense yellow cake reminded us of an upscale Twinkie. The vanilla frosting was light and flavorful. In the center was a small dollop of blueberry jam that paired well with everything.
The decoration on the outside is gorgeous. A strip of white sugar crystals outlined in majestic liquid gold! The sugar is surely a play on Elsa’s frozen ice crystals and adds a perfect crunch to each bite. And sitting nicely on top of the cake is a gold, hidden Mickey. They’ve truly knocked it out of the park with this one.
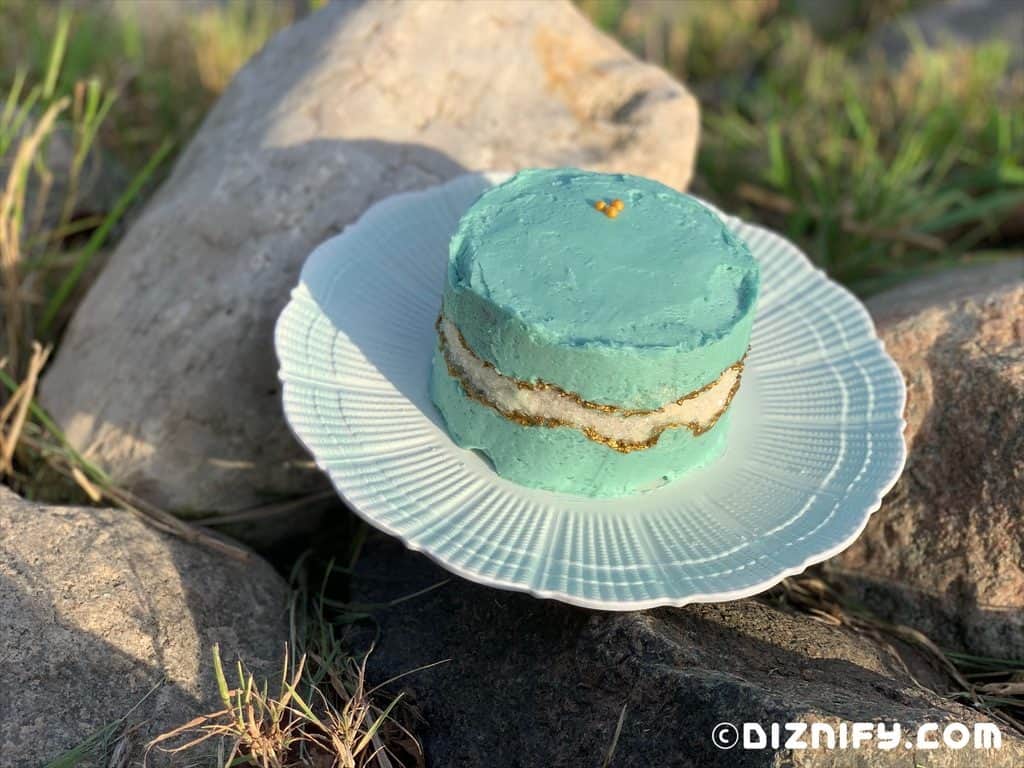
We will note that Disney Food Blog reported that the frosting on their Arendelle Aqua cake was blueberry flavored. We thought that our frosting, although aqua colored, was vanilla flavored. Since we later discovered we had tried this cake a few weeks before its official release, we may have gotten a sneak peek at this treat before it was finalized for sale to Disney guests.
We personally love how well the vanilla frosting compliments the yellow cake and blueberry jam, and have modeled our Arendelle Aqua Cake copycat recipe accordingly. If you love the blueberry flavor, we suggest adding some of the blueberry jam or extract to your frosting.
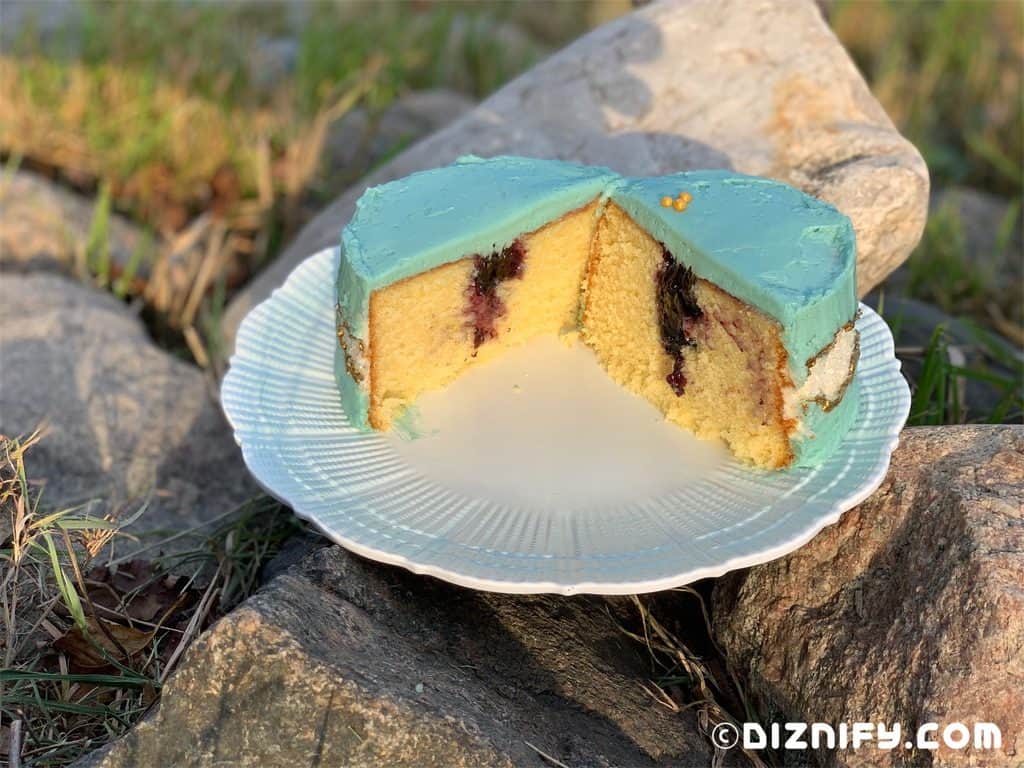
We owe thanks to Spend with Pennies and to Unsophisticook for the tasty cake and frosting recipes we used for this Arendelle Aqua Cake copycat recipes, and to XO, Katie Rosario for giving us the knowledge and confidence to construct the cake and for teaching us that this is a fault line cake, a treat trend inspired by geological fault lines. Disney looks to have been heavily inspired by XO, Katie Rosario’s fault line cake. While it’s not Disney per say, we LOVE this version, too, and can’t wait to make it!
Arendelle Aqua Cake Copycat Recipe
Yield: Two, 4" cakes
1. Make your cakes.
We used this cake recipe from Spend With Pennies, but cut the recipe in half and used half of a package of vanilla pudding mix instead of the vanilla to give it more of that twinkie flavor. Since we altered the recipe a bit, we’ve listed the ingredients below for your convenience.
Cake Ingredients
- 1 cup + 6 tablespoons cake flour
- 1/4 teaspoon baking soda
- 3/4 teaspoon baking powder
- 1/2 teaspoon salt
- 3/4 cup granulated sugar
- 2.5 tablespoons vegetable oil
- 1/3 cup butter (about 5 – 6 tablespoons), room temperature
- 1/2 of a 5.1 ounce package of Jello instant vanilla pudding and pie filling
- 1 large egg, room temperature
- 1 large egg yolk, room temperature
- 3/4 cup buttermilk, room temperature
Instructions
Please pop over to the recipe here for steps on how to make the cake, and heed these instructions:
1. Bake up your cakes in two*, 4” cake pans sprayed with cooking spray and place a 4” round piece of parchment paper in the bottom of each pan. Bake 35 – 40 minutes or until a toothpick inserted into the center of the cakes come out clean.
2. Once the cakes are out of the oven and have sat in the pan for 10 minutes, carefully remove the cakes from the pans by turning the pans upside down. Remove the parchment paper from the cakes and allow the cakes to cool completely before making the frosting. If you don’t frost the cakes right away after they’ve cooled, wrap them in plastic wrap and store at room temperature.
* If you only have one cake pan, refrigerate the remaining cake batter while the first cake is cooking. Once the first cake is done, remove the remaining cake batter from the fridge to thaw. After the first cake is removed from the pan, wash the pan and add more cooking spray and parchment paper.
2. Make the white frosting.
We used this frosting recipe from Unsophisticook, but cut the recipe in half and cut back on the vanilla since we used a vanilla with a strong taste (you can adjust according). Since we cut the ingredients in half and altered the recipe a bit, the ingredients we used are listed below for your convenience.
Ingredients
- 1 stick unsalted butter (8 tablespoons)
- 2 cups organic powdered sugar
- 1 teaspoon of clear vanilla flavor extract (use clear so it doesn't alter the color). We used Watkins brand clear vanilla.
- 2 tablespoons heavy whipping cream
Instructions
Please pop over to the recipe here for steps on how to make the frosting! You'll use this white frosting first, so do NOT add aqua food coloring yet.
3. Assemble your Arendelle Aqua Copycat Cake.
Special Supplies and Ingredients
Please note that we get a commission if you use the Amazon links below.
- Two, 4” diameter x 3” deep round cake pans, or you can use one of these 4" x 3" pans.
- Parchment paper cut into two, 4” circles.
- Food coloring (aqua color). We used Wilton Color Right food coloring.
- White sparkling sugar. We used a mix that came with both gold pearls and the white sparkling sugar.
- Edible gold pearls. We used a mix that came with both gold pearls and the white sparkling sugar.
- Edible gold paint. We used Wilton metallic edible paint. We preferred the copper color over the gold, but use whatever you’d like!
- Small food decorating brush. We used the smallest brush from a Wilton brush set.
- Icing smoother
- Offset, icing spatula
- Cupcake or treat corer (or a knife)
- Smuckers brand Simply Fruit blueberry spreadable fruit (jam).
Instructions
See the 10 steps below! And, for inspiration on how to build a fault line cake, please watch this how-to video by XO, Katie Rosario!
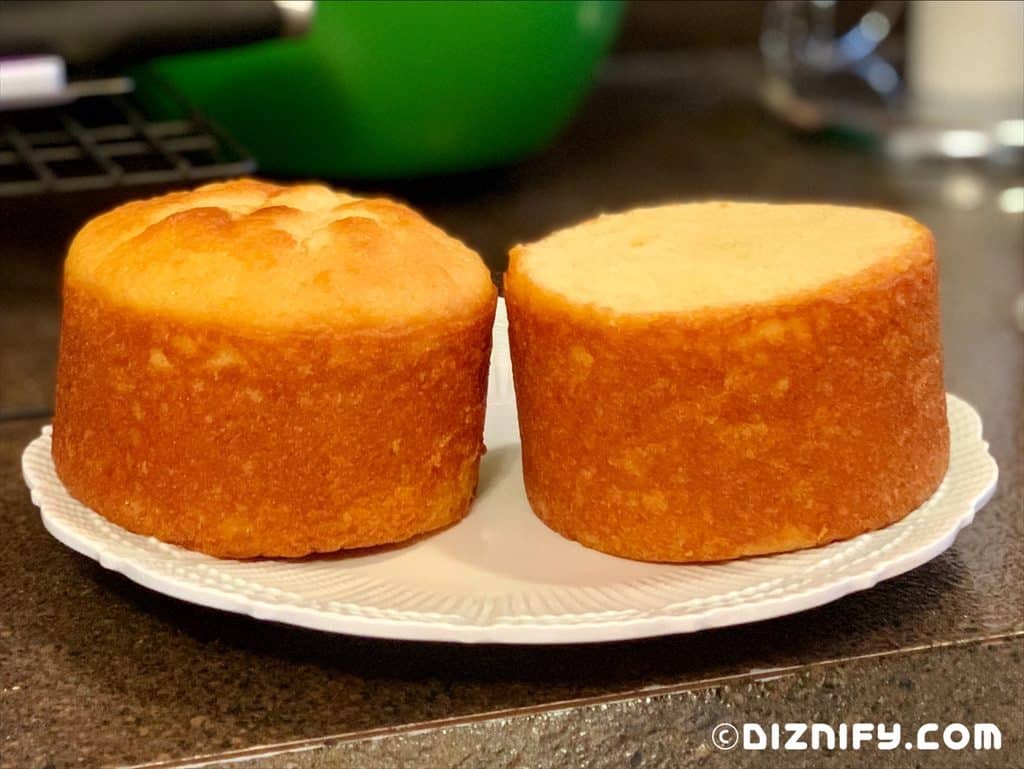
1. Start by leveling the cakes by cutting off the dome of each cake. See before and after photo below. The cake on the left hasn’t been leveled yet, and the cake on the right has.
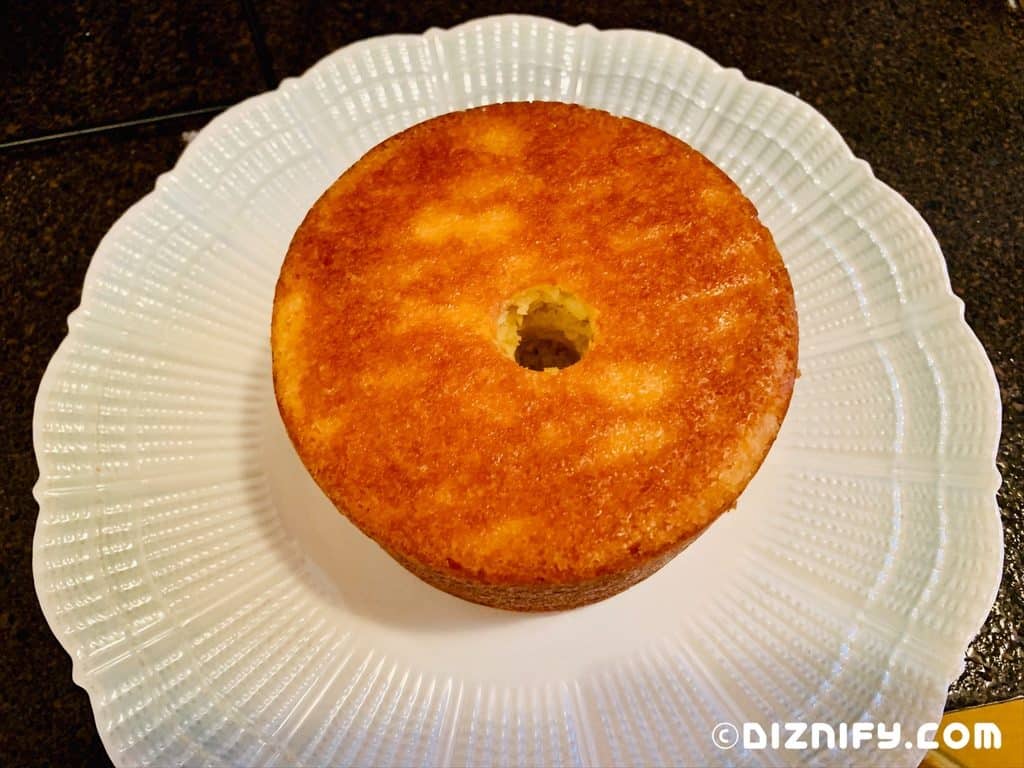
2. Flip the cakes over so that the leveled sides are on the bottom. Cut out the center of each cake with a treat corer or knife about 50 – 75% of the way down.
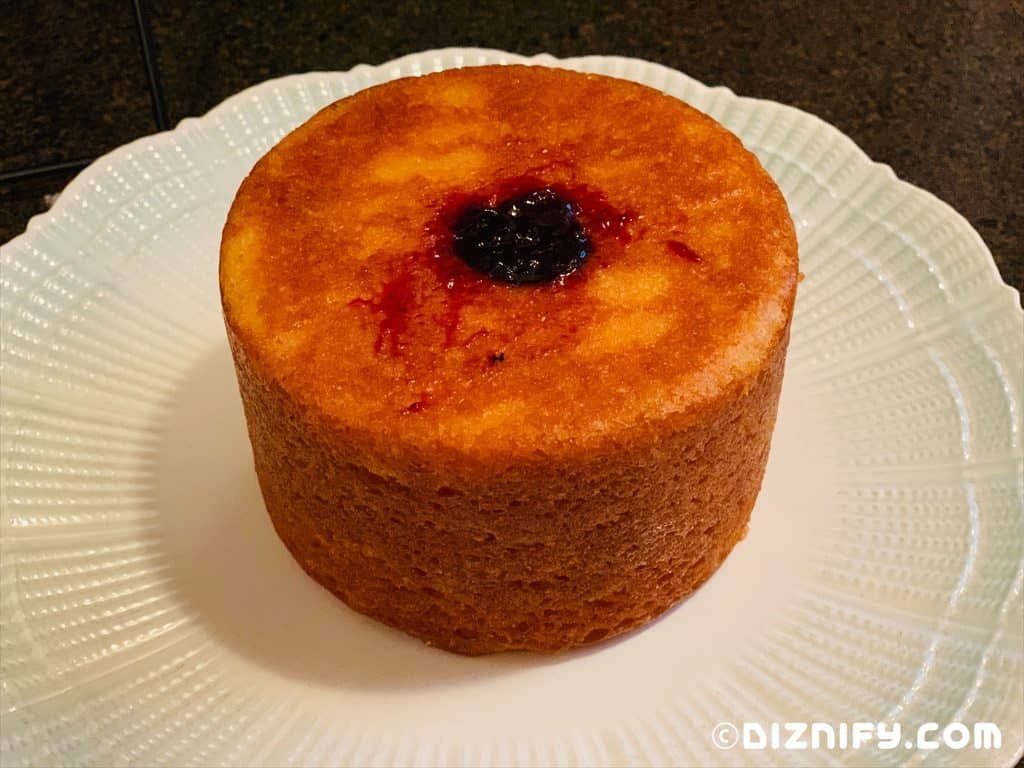
3. Add 2 – 3 teaspoons of blueberry jam into each cake. Don’t be afraid to push the jam down into the hole. Remove any jam that’s pouring out the top of the hole. See photo below.
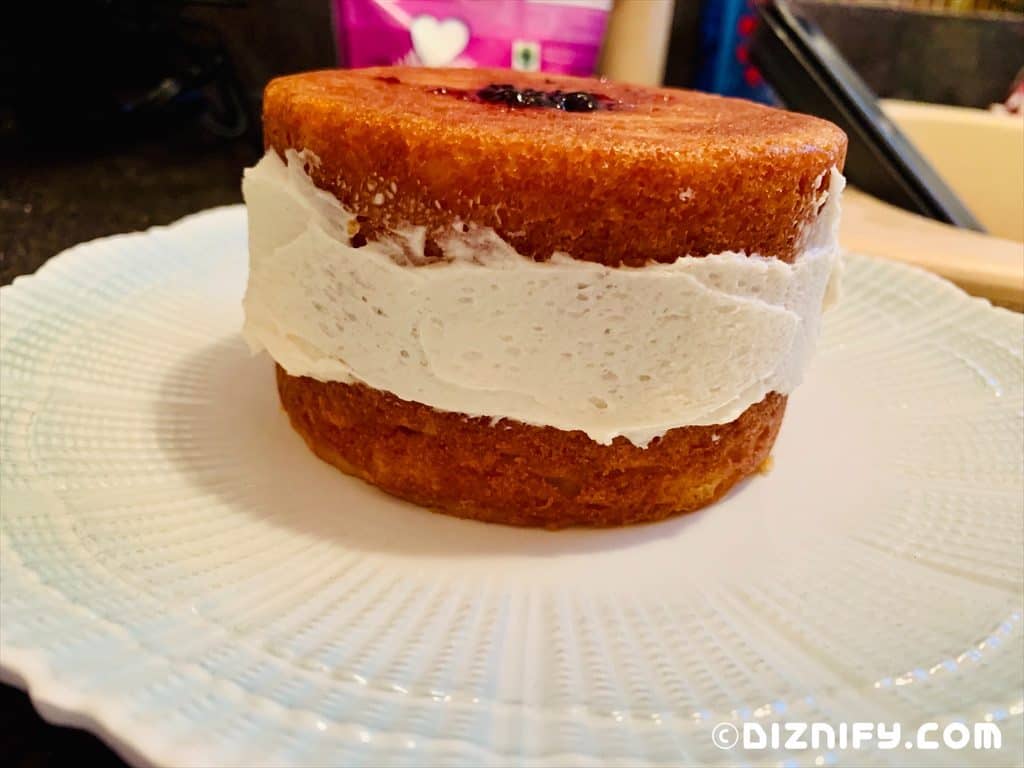
4. Using your icing spatula, add a layer of white frosting around the outer center perimeter of the cakes. Then, use an offset knife to even out the white frosting. See photo below.
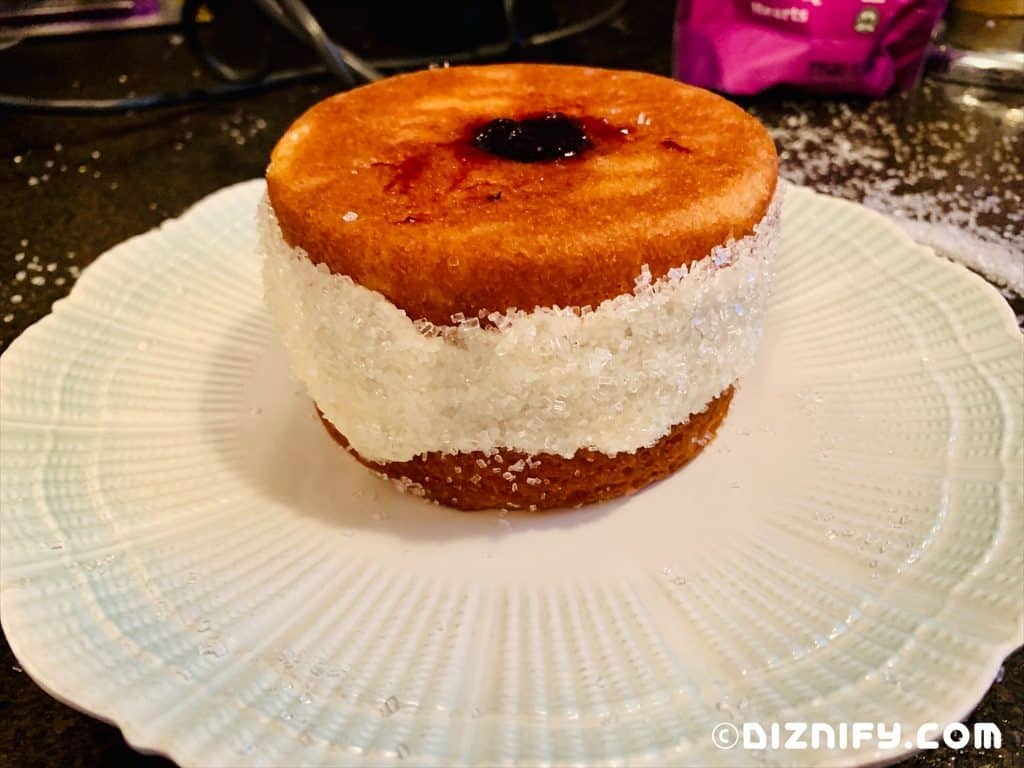
5. Take a handful of sparkling sugar and press it into the white frosting to adhere. All the white frosting should be coated in sugar. See photo below.
6. Next, you’ll add food coloring to your white frosting to turn it aqua. In a separate small bowl, we mixed two drops of blue with one drop of brown Wilton Color Right food coloring. No matter what food coloring you use, add it to the frosting just a dab at a time, mixing in between each addition, until you get a nice shade of aqua.
7. Add 1/4 cup of aqua frosting to the tops of the each cake. Using your icing spatula, spread the frosting evenly on the tops of the cakes and down the sides stopping at the top of the white sugar layers. Then, add aqua frosting below the white sugar layer. It doesn’t have to look perfect. See photo below.
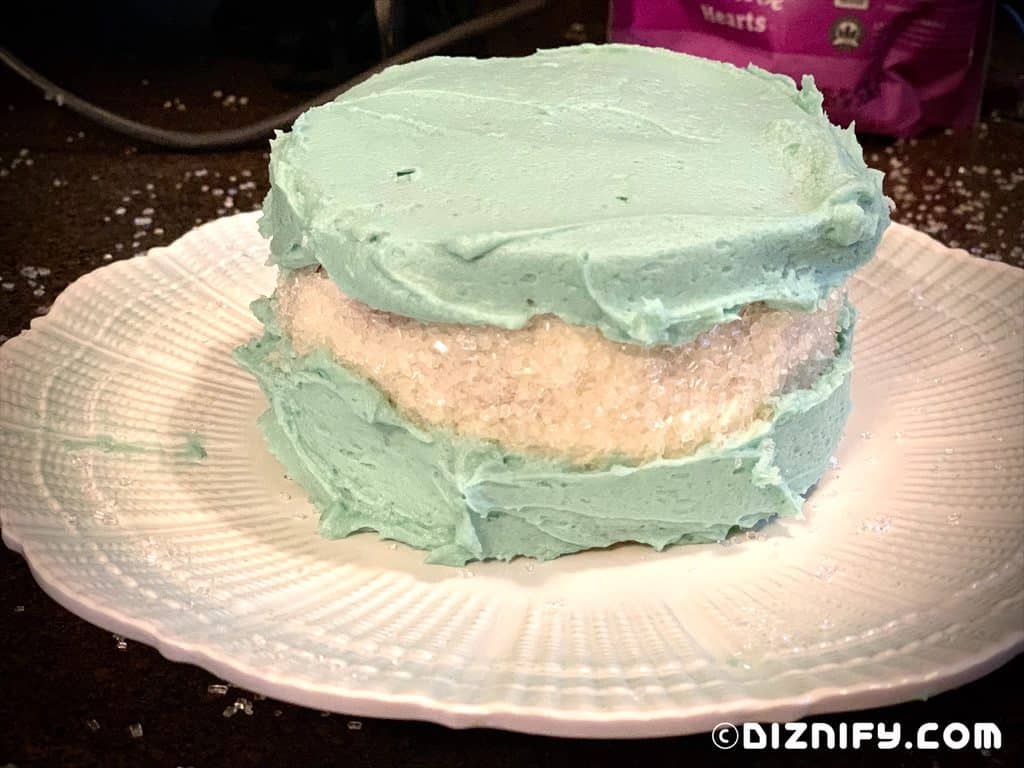
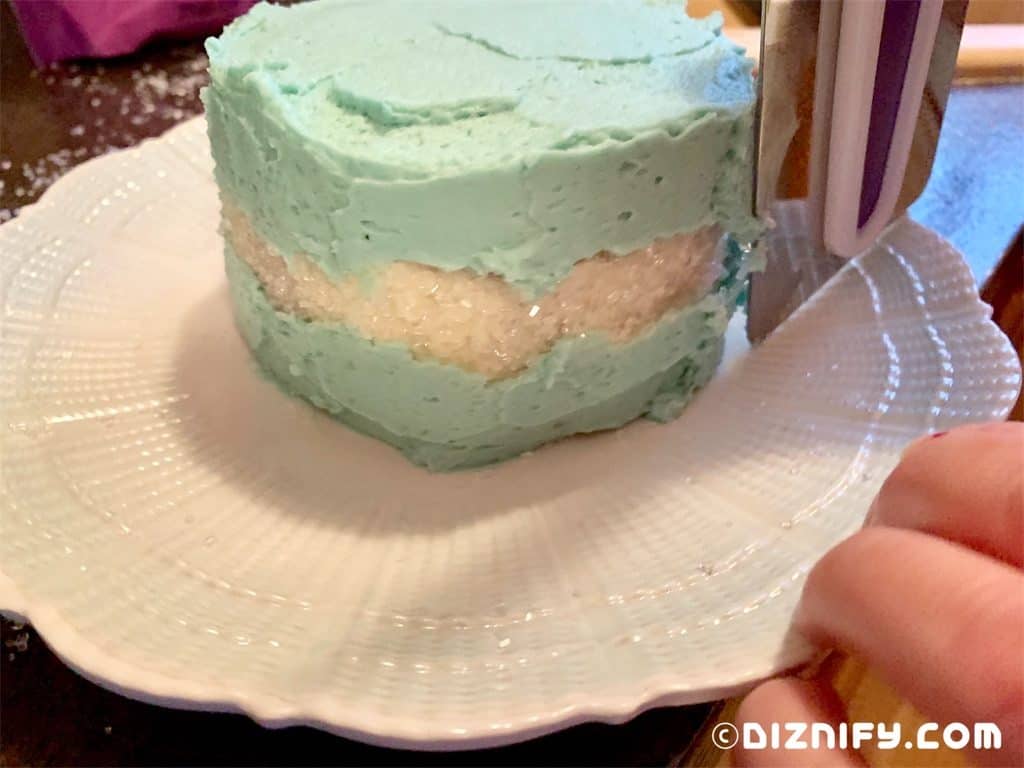
8. Run a frosting scraper around the outside perimeters of the cakes to even out the frosting.
9. Use a food paintbrush to dab layers of edible gold paint onto the aqua frosting right where it meets the white frosting layer. See photo below.
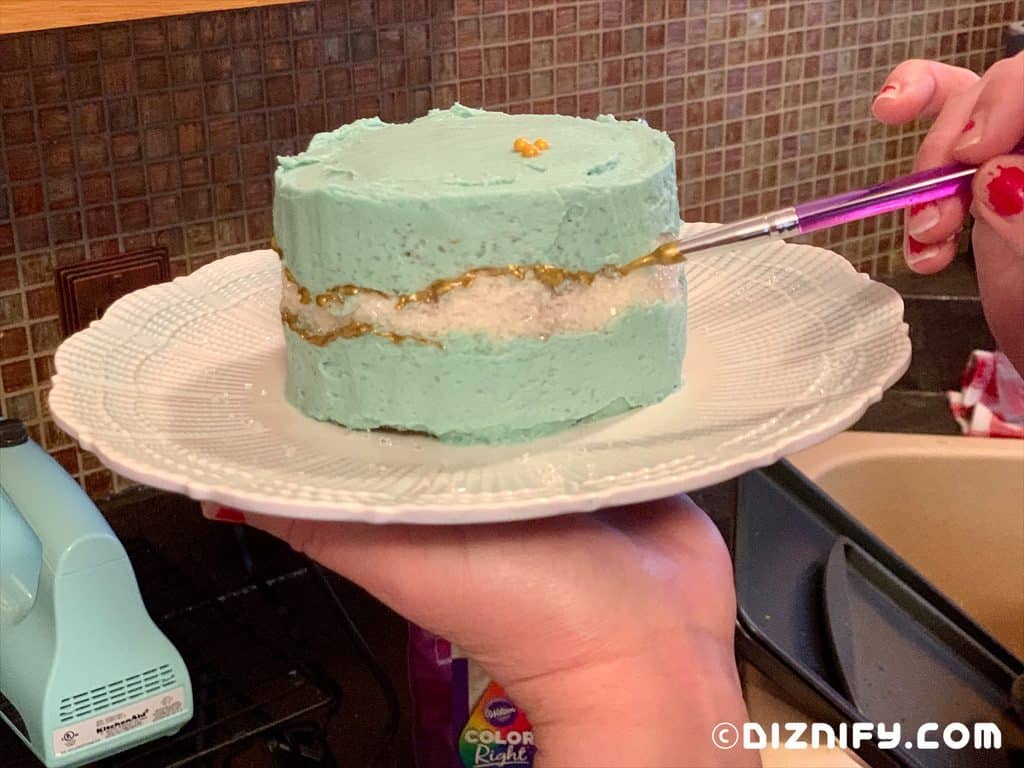
10. Finish by adding edible gold pearls, in the shape of a hidden Mickey, on the top of the cakes.
If you don’t eat the cake right away, store it in the fridge. When ready to eat, let it come to room temperature or eat it cold.


Leave a Reply