Diznify’s winner for the 2019 best holiday treat goes to the Double Chocolate Peppermint Ice Cream Cookie Sandwich from Disney Animal Kingdom’s Dino-Bite Snacks, and we’ve got the copycat recipe!

Made to order, this treat starts with two chocolate cookies, one of them dipped in a peppermint-y white chocolate and decorated with red stripes to look like a candy cane! A Disney Cast Member scoops a huge mound of vanilla ice cream between the cookies before rolling the cookie sandwich in a tub full of crushed candy cane pieces.
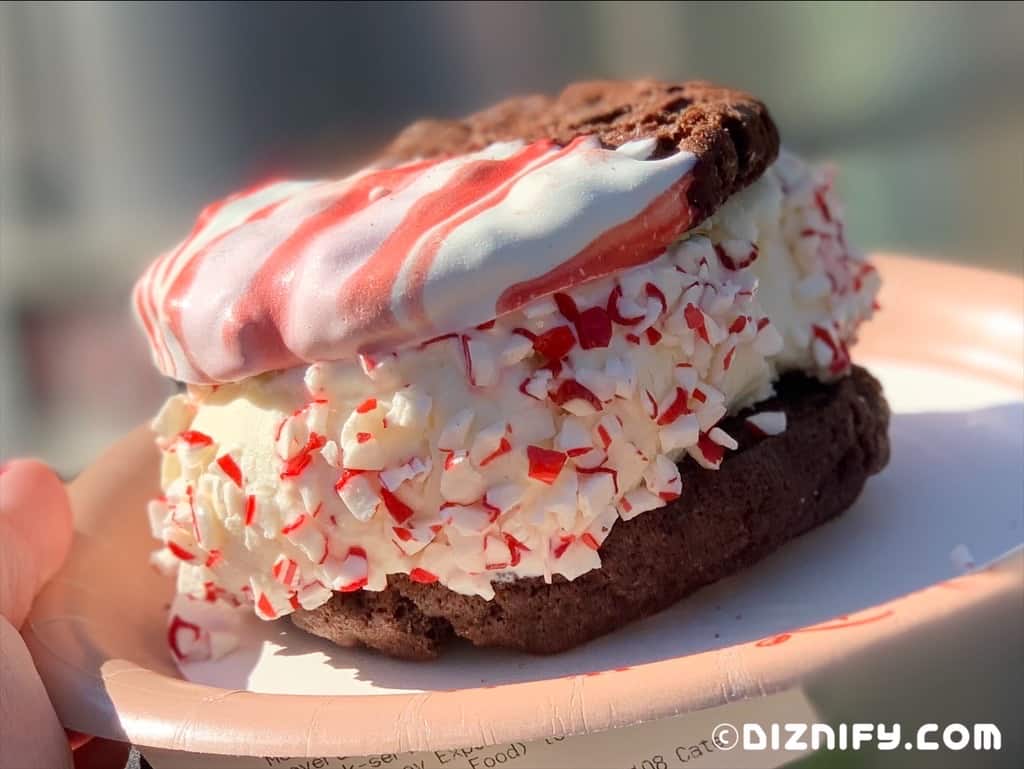
And it's just as yummy as it looks. The chocolate cookies taste like crunchy brownies and, when paired with the ice cream, reminds us of a Disney Beaches and Cream’s Fudge Mud Slide. If you’re a fan of mint chocolate, there’s a lot to love here, too! Our favorite part of the sandwich is the peppermint flavored white chocolate, reminiscent of peppermint bark. Yum!

Disney Chocolate Peppermint Ice Cream Cookie Sandwich Copycat Recipe
Yield: Six, 4” ice cream cookie sandwiches
Special Supplies
A toothpick or food decorating brushes that we used for our Arendelle Aqua Cake Copycat Recipe.
To us, it looks like Disney uses food decorating brushes to paint red stripes on their cookies, but we thought we’d try ours with a toothpick in case you don’t have brushes on hand. These can be decorated with either tool.
Cookie Sandwich Making Ingredients
- 20 ounces Ghirardelli brand white chocolate melting wafers*
- 1/2 teaspoon peppermint extract
- Red food coloring
- 1.5 cups of crushed candy canes
– 6 heaping cups of Edy’s vanilla ice cream
*You need a lot of white chocolate to make the cookies easier to dip. In this recipe, we are only dipping the cookies that make the top of the sandwiches (6 cookies total), but there will be leftover chocolate if you want to dip or drizzle it on the remaining cookies.
Cookie Baking Ingredients
- 1.5 cups all purpose flour
– 1/4 teaspoon baking powder
– 1/4 teaspoon baking soda
– 8 tablespoons butter, softened
– 8 tablespoons vegetable shortening
– 1/2 teaspoon salt
– 3/4 cup granulated sugar
– 1/2 cup light brown sugar
– 1 egg
– 1 tablespoon corn syrup
– 1 teaspoon vanilla extract
- 3/4 cup unsweetened cocoa powder
- 1/2 cup semisweet chocolate chips
Instructions
1. Bake the Cookies
1. Preheat the oven to 350 degrees.
2. Line a baking sheet (we used a 12″ x 17” cookie sheet) with parchment paper.
3. In a small bowl, stir together the cocoa powder, flour, baking powder and baking soda.
4. Make the cookie dough! Using a mixer, blend the butter, shortening, brown sugar, granulated sugar and salt together until combined. Add the egg and mix until incorporated. Add the corn syrup and vanilla and mix until combined. Then, adding about a third of the mixture at a time, add the dry ingredients (cocoa powder, flour, baking powder and baking soda) and mix until fully incorporated. Finally, stir in the chocolate chips.
5. Using a 1/4 cup measuring cup, drop clumps of dough onto the parchment paper. (Don't overfill the measuring cup or you won't have enough dough for 12 cookies.) If the clump of dough isn’t already circular, pick up each clump of dough and form it into a ball, and then place it back on the cookie sheet. Space each ball equally apart so, as they cook, the cookies have room to spread without running into each other.
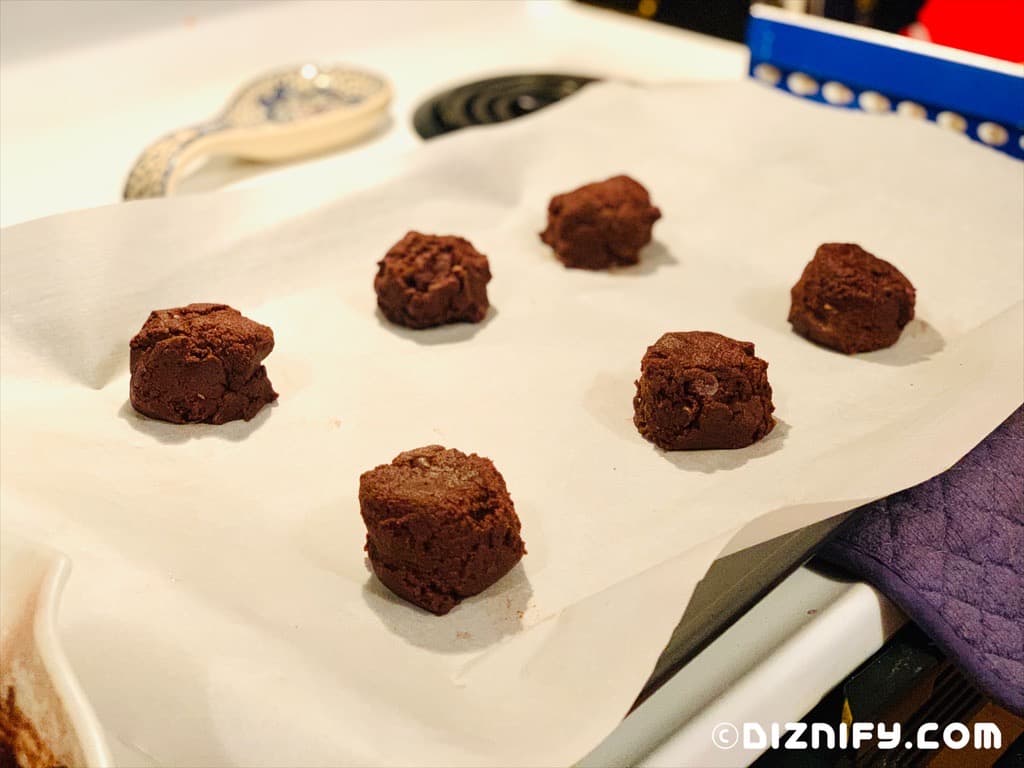
6. Bake 16 - 18 minutes. Let the cookies sit on the baking sheet for 5 minutes, then transfer to a cooling rack to cool completely. The cookies can be stored for 1 – 2 days if you’re not assembling the cookie sandwiches right away.
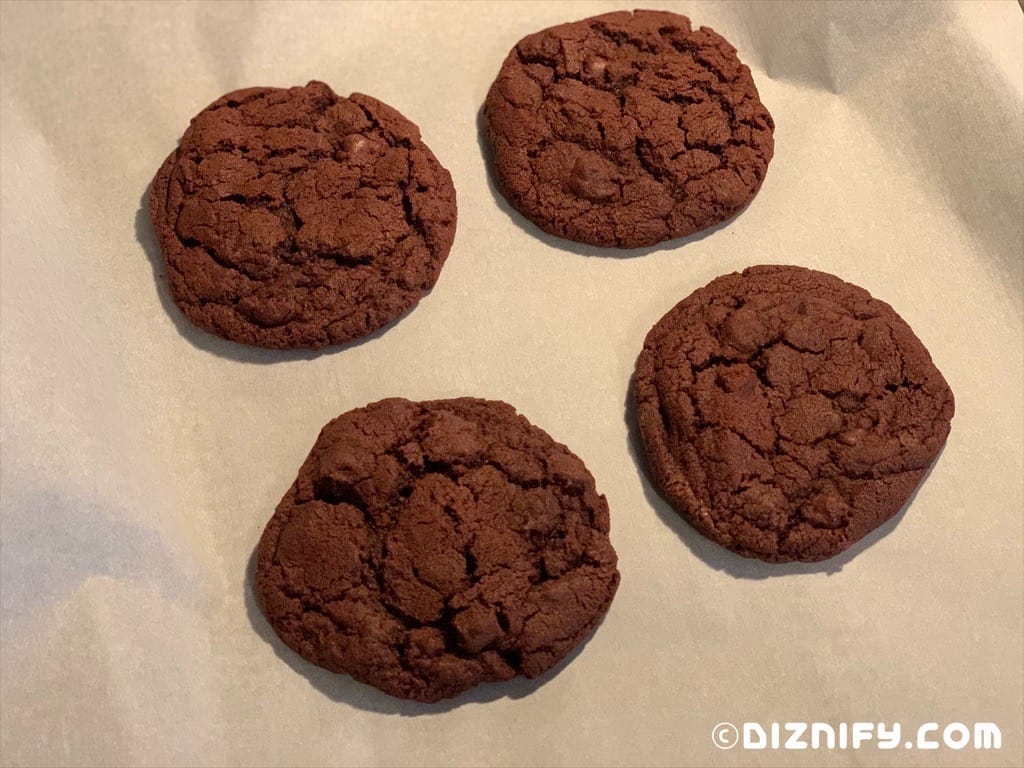
2. Dip and Decorate 6 Cookies
1. Once the cookies are completely cooled, line a baking sheet with parchment paper.
2. Melt the white chocolate in a small bowl. We microwaved ours on 50% power until melted. Add the peppermint extract and stir.
3. Transfer a tablespoon of white chocolate to a small bowl and add a few drops of red food coloring to dye it red. Add water to loosen it up a bit. Think of this as creating an edible red paint!
4. Dip a cookie halfway into the white chocolate. You might need to tilt the bowl to get half of the cookie submerged in white chocolate. Then place the cookie (top side up) onto the parchment paper.
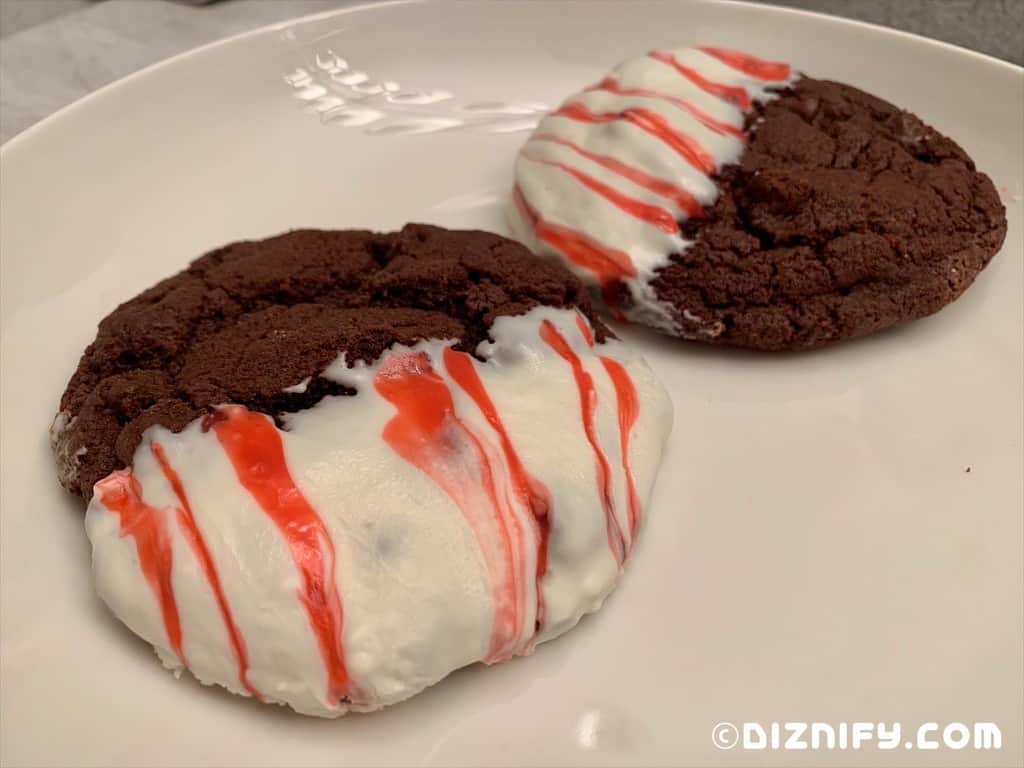
5. If using a toothpick, immediately paint red stripes onto the white chocolate while the chocolate’s still wet. Allow a few of the stripes to run into each other, creating some wider stripes in addition to thin stripes. If using food decorating brushes, pop the white chocolate dipped cookies in the refrigerator until the white chocolate sets, then paint red stripes onto the cookies.
Repeat until 6 cookies are coated. If you have any remaining white chocolate, you can dip or drizzle more cookies with white chocolate.
6. Once the cookies are covered white chocolate and red stripes, let them sit for at least a half hour so the white chocolate set. To speed up this process, you can also pop the cookies in the refrigerator for about 10 minutes.
3. Assemble the Cookie Sandwiches
Note: We don’t recommend assembling these sandwiches ahead of time because the crushed candy cane pieces melt into the ice cream. If you have to make the sandwiches ahead of time, assemble only the cookies and the ice cream. Then, just before serving, roll the sandwiches in crushed candy canes.
1. Take two cookies (one dipped in white chocolate and one not) and place a heaping cup of ice cream in the center. Smash the cookies down until the ice cream extends past the sides of the cookies just a little bit.
2. Roll the ice cream (sides of the cookies) into crushed candy canes. The candy canes should stick into the ice cream. If you find that it’s difficult to roll the sandwiches in the crushed candy canes, use your hands to apply the crushed candy canes to the ice cream.

We hope you enjoy this Disney inspired Peppermint Ice Cream Cookie Sandwich as much as we do! With the ability to make the double chocolate cookies ahead of time, this is the perfect dessert to have after Christmas dinner. It’s sure to wow everyone in your Disney family!


Leave a Reply